WPfomify Documentation
How to Migrate from WPfomify to WPfomify 2.0?
We have just rolled out the WPfomify 2.0 and it has so many good things to offer!
Check here what makes WPfomify 2.0 so awesome?
All our existing users can now update their WPfomify version to the WPfomify 2.0. Here is a step by step instruction how you can do that.
How to successfully upgrade to WPfomify 2.0?
Please follow the steps in the same order as mentioned below so you can upgrade to 2.0 without any difficulty.
Step 1: Removing the Add-ons
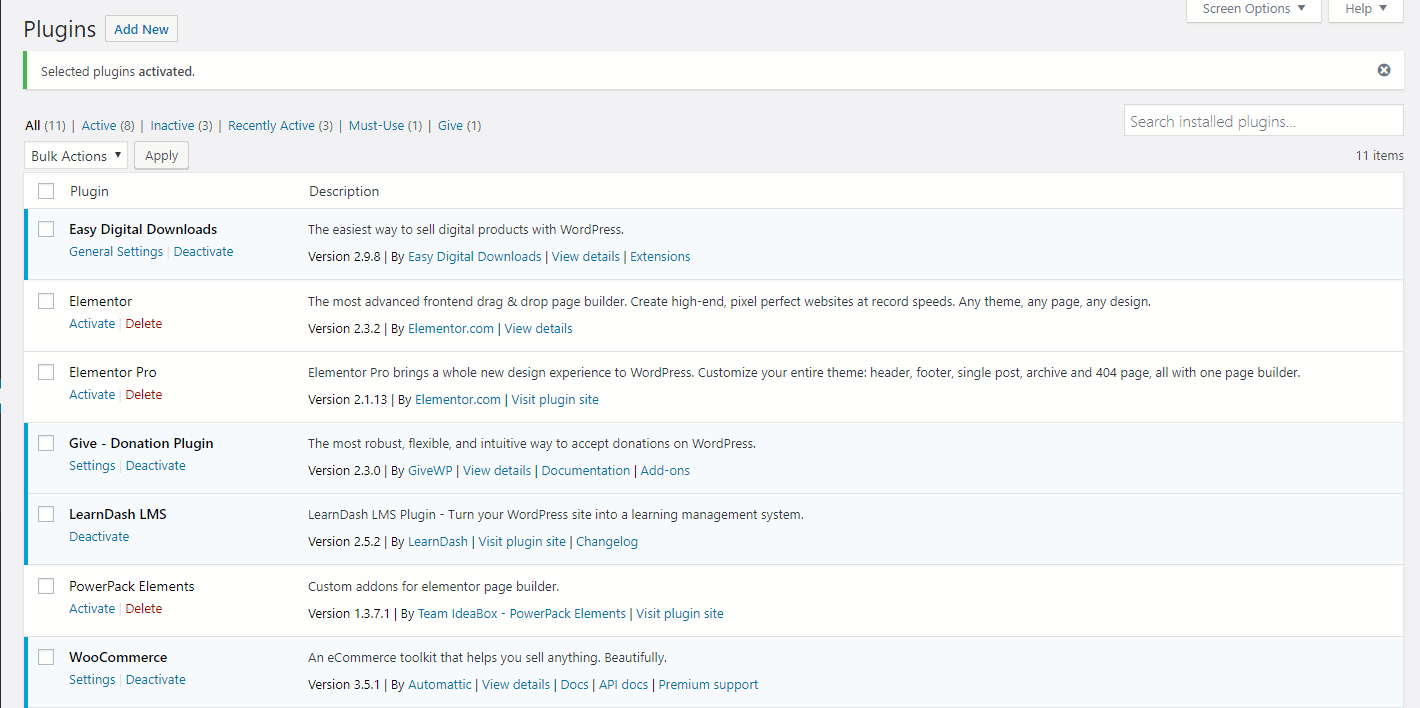
The first thing you need to do is remove the addons. For this Log in to your WordPress dashboard and go to WP admin > Plugins.
Now look for the WPfomify addons and deactivate and remove them one by one.
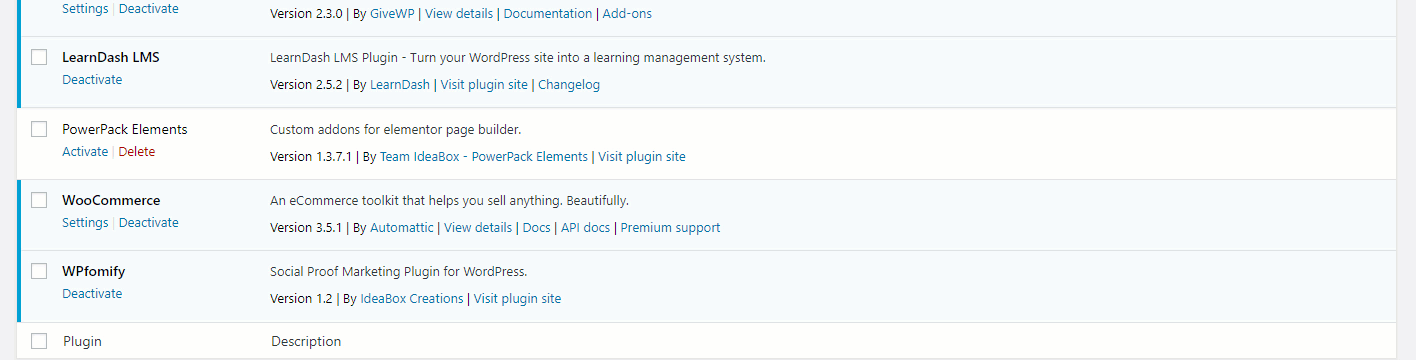
Step 2: Removing the WPfomify Plugin.
Now you need to remove the WPfomify Plugin. For this, simply deactivate the plugin and then delete it manually.
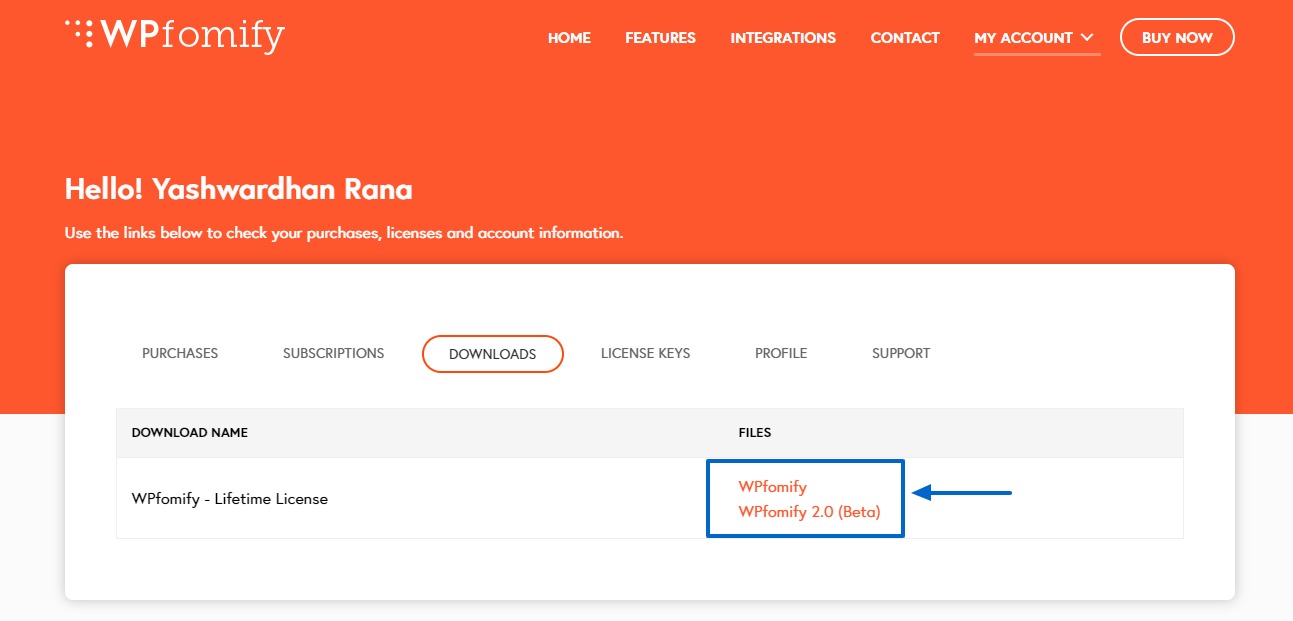
Step 3: Downloading the WPfomify 2.0 plugin
Now you need to upload the WPfomify 2.0 Plugin.
Go to WPfomify.com and then click on the My Account menu. Click on the Downloads tab and then click on the WPfomify 2.0 link. This will start your download.
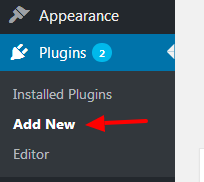
Step 4: Installing the WPfomify 2.0 plugin
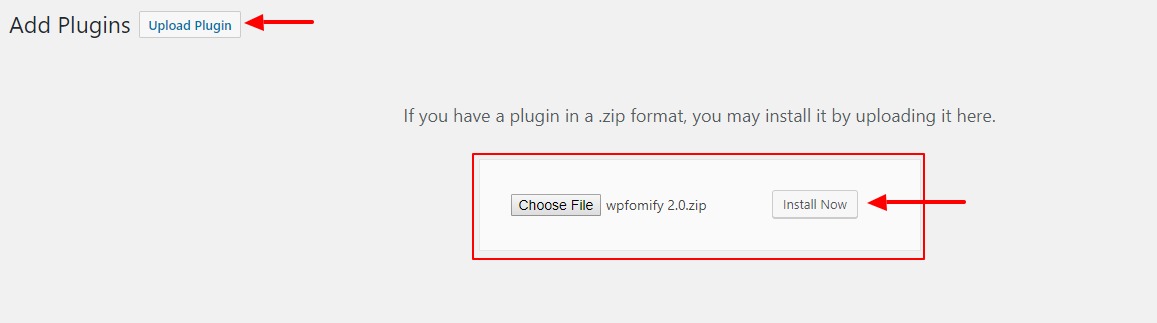
Go back to your Website’s WordPress dashboard and then go to Plugins and click on Add New.
Click on the Upload plugin button and select the file. Click on the Install Now button.
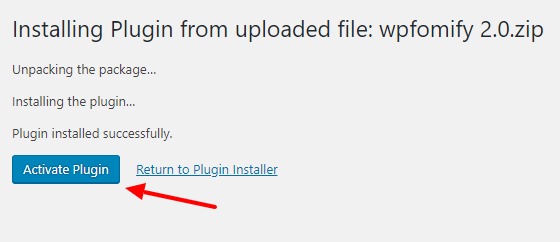
Once the plugin is installed, click on the activate button to activate the plugin.
Congratulations! You have successfully migrated to WPfomify 2.0! 🙂
You can go ahead and create your first notification with the WPfomify 2.0 and if you want to learn more about the new User Interface, you can read our Documentation.