How to Build Trust by Displaying Recent Sales on your Easy Digital Downloads Store
October 9, 2019 · Puneet
")
Displaying recent sales activity on your Easy Digital Downloads store is similar to the real-life customer activity you would see on a brick & mortar outlet. It’s a human tendency that we trust a busy outlet. You can leverage the same on your website with Social Proof & Trust Marketing plugin – WPfomify.
What is Social Proof Marketing?
If you are new to this term, I would like to share a quick overview of Social Proof Marketing. Let’s take an example, you are making a walk around on your weekend at a popular spot, and it’s time for lunch. You start looking for an excellent place to eat and find a few jam-packed restaurants, a few that are a little busy and the rest empty. Which one would you pick? Surely, you would prefer going to a busy restaurant assuming that it’s supposed to be good.
This phenomenon where others’ activity psychologically impacts your decision is called Social Proof Marketing. In non-technical terms, we can call it “following the crowd” 😉
How can Social Proof Marketing help you Increase Conversions?
Social Proof Marketing uses the psychological phenomenon of building trust among your website visitors. Displaying recent sales activity on your site makes the visitor trust your business.
Display Recent Sales for Easy Digital Downloads
WPfomify comes with a powerful and easy to use integration for Easy Digital Downloads. With this integration, you can display recent sales for all the products or a particular product. You also get the option to link the notification box with the product page or any custom URL. To help you with tracking the conversions, WPfomify also offers custom fields for UTM Parameters. By adding UTM Parameters, you can track the conversions in Google Analytics.
Let’s see how we can create an attractive notification bar to display recent sales on your EDD store using the WPfomify plugin.
Before we begin, make sure you have installed & activated both Easy Digital Downloads (EDD) & WPfomify plugin.
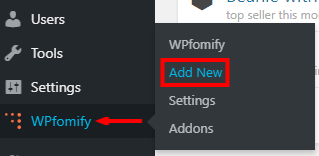
1. Setting Up WPfomify
Go to your WordPress Dashboard and navigate to the WP admin area > WPfomify > Add New.
2. Create an Eye-Catchy notification bar to display recent sales
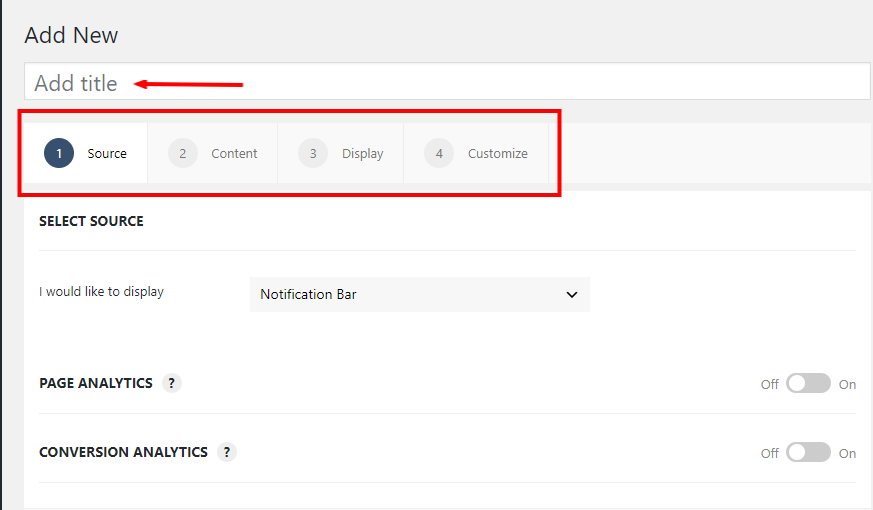
As soon as you click the “AddNew” option, you will see a new window with the title “Add New.” Here you have to give a name to your notification & proceed for further options.
With the WPfomify plugin, you can display recent sales activity on your WordPress website impressively. Its multiple styling features let you customize & style every aspect of the notification bar.
Stunning notification bars not only attract visitors’ attention but also make them stay longer on your site. Showcasing recent sales on your web pages create a sense of urgency among your visitors & make them buy to more from you.
3. Customizations in Source Tab
Select Notification Type & Source:
This is the first option of the Source Tab; here you have to define your preferred notification type & source. You can choose from the drop-down list whether you want to display Notification Bar, Recent Conversions, Reviews or Floating Button on webpages.
I choose Recent Conversions as a notification type & Easy Digital Downloads as a source.

Impressive Sales Notification to Boost Conversions:
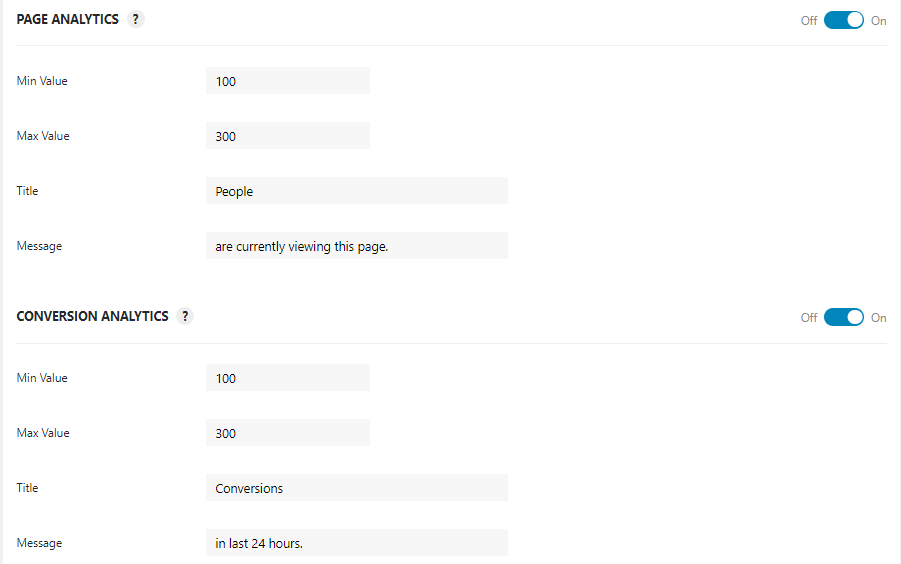
We all know the importance of showcasing conversions & recent sales on the Easy Digital Downloads Store.
With WPfomify plugin, you can display Recent Sales Activity such as “128 People are currently viewing this page” or “205 Conversions in last 24 hours”. Displaying these live data helps you to skyrocket sales & conversions.
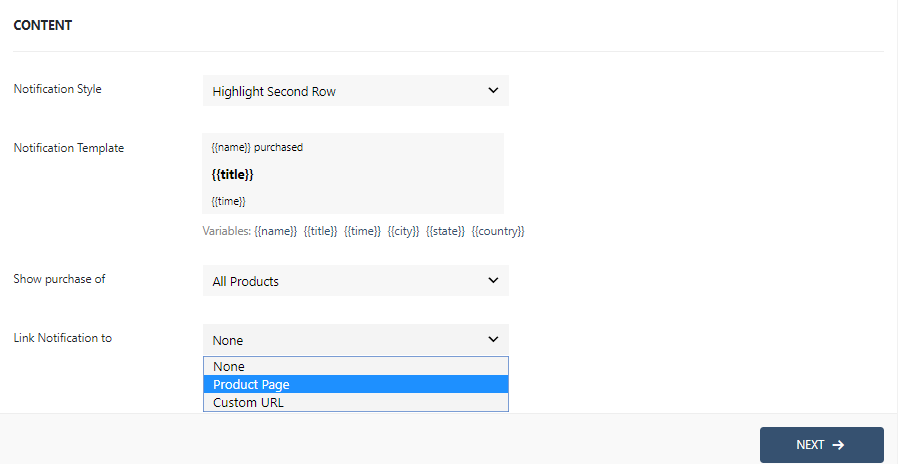
4. Customizations in Content Tab
WPfomify gives you the flexibility to add customized content for the notification bar. For example, if you want to display your buyer’s Name, City & State in the notification bar, you can easily do it by mentioning the variables shown below.
Show purchase of a specific product or product category
Whether you want to display the purchase of a particular product or only want to display the purchase of a particular category of products, the WPfomify plugin has got you covered.
With this feature, you can display recent sales notification of a particular product category. Also, it gives you the flexibility to exclude some products from the list.
Furthermore, you can add a link of a product page or can add a custom link to the notification bar so that the visitor can be easily redirected to a particular page.
5. Customizations in Display Tab
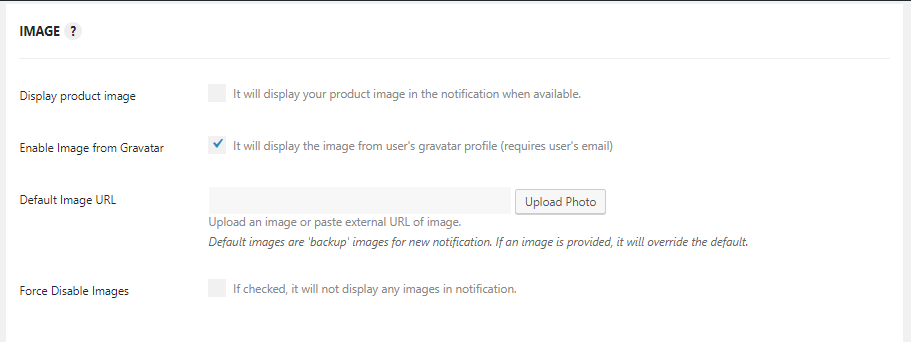
In-display tab, you find two sections: Image & Visibility
Display default product image or add custom image URL in the notification bar
With the Image option, you can display default product images or can also add a custom image URL in the notification bar.
Moreover, if you want to display user gravatar in the notification bar, click the “Enable Image from Gravatar” option.
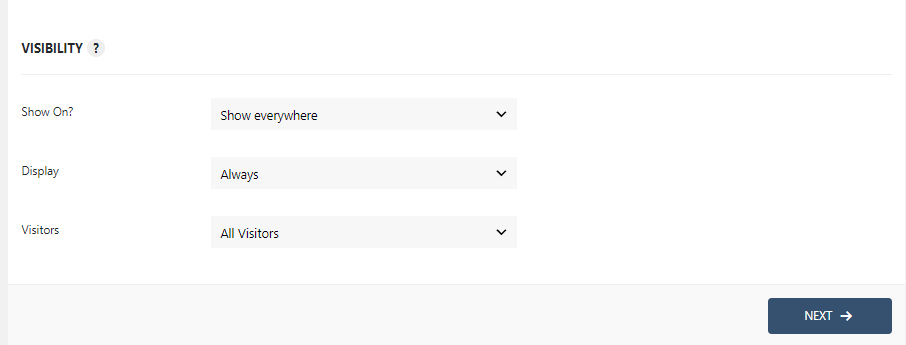
Set a limit to notification visibility
Every time it is not necessary to shown sales notification on all web pages. For example, for an e-commerce website, it is very beneficial to display a notification on product pages & not necessary to display them on check-out pages.
To solve this problem, we have integrated the “Visibility option” in the WPfomify plugin. This option lets you control the visibility of the notification. Either you can display it on every web page or can specify the particular page where you want it to show.
Furthermore, you can also display the notification based on the user role. It can either be shown to all visitors or only to new visitors.
6. Customizations in the Customize tab
Set appearance location of the notification bar
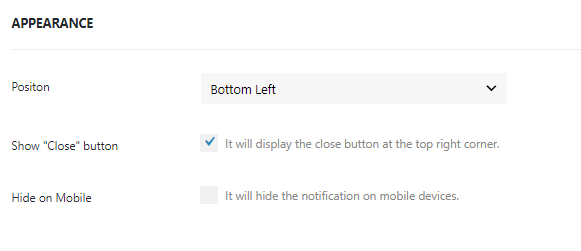
Appearance is the first feature of the customize tab; with this feature, you can set the appearance location of the notification bar. Either you can set it on “Bottom left” or “Bottom Right” on the page.
Additionally, you can also add a close button on the notification bar, which makes it more useful for your visitors.
Also, it gives you an option to hide notifications on mobile devices.
Set your preferred timing for the notifications
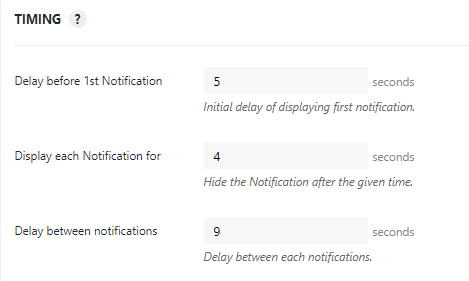
Timing feature gives you the freedom to set initial delay & delay timing between notifications. Although we have set default timing for the highest conversions with the auto setting, however, if you want to set custom timing, you can easily do it by this option.
Control when should the notification appear
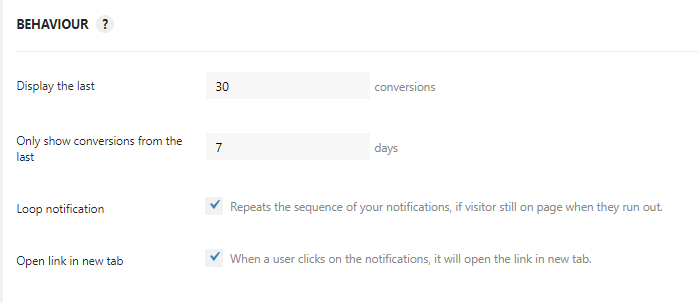
With this feature of the WPfomify plugin, you can control the display behavior of the notifications. For example, if you only want to display the last seven days’ conversions, you just have to set a value in this section.
Customize every aspect of Notification Bar as per your preference or your Website Looks
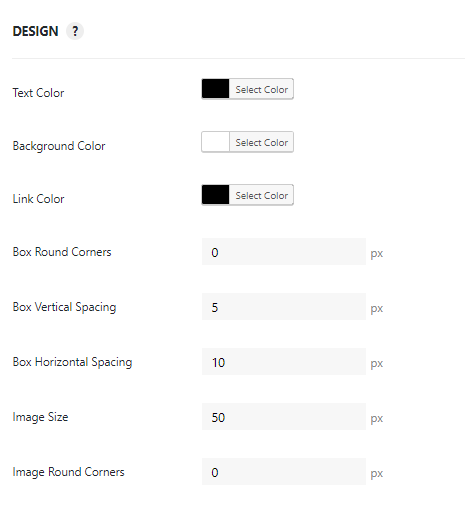
WPfomify comes with a design option that lets you customize & style every aspect of the notification bar. Here you can customize Text, Background & Link Colour. Also, you can add styling features to the notification.
Apart from this, it also gives you the freedom to change Image Shape & Image Position.
With the ‘Typography’ section, you can change the Font Size for each row of the notification bar.
With all these impressive features of the WPfomify plugin, you can easily design amazing Recent Sales Notification for your EDD store.
Increase your WooCommerce Sales, Get WPfomify now!
Increase sales, make more money, get more customers, all that with a few clicks! Get WPfomify for your WooCommerce website.