Increase your Sales by Displaying WooCommerce Recent Sales Pop Notifications
October 9, 2019 · Puneet

Your WooCommerce store is ready for launch or already doing good with sales? But did you think about how you can get more sales? Getting sales for a new store can be a bit difficult, and increasing sales for an existing store means more revenue! An easy way to boost your sales and conversions is to display WooCommerce recent sales notifications. Showing recent sales activity is a marketing technique called “Social Proof Marketing.”
Social Proof Marketing is an efficient and proven method of increasing sales. Displaying recent WooCommerce sales notifications on your website helps you create social proof for a busy store.
Why should you Display Recent WooCommerce Sales Notifications?
The most crucial reason to display recent sales notifications is to build trust. A busy store creates a psychological impact on your website visitors. Honest marketing can help you develop healthy relationships with your prospective and existing customers/buyers or website visitors. The top benefits of displaying recent sales notifications on your WooCommerce website are:
- Increase conversions and sales effortlessly.
- Create a positive impression of a busy store.
- Build trust among new customers.
- Showcase your store’s popularity.
- By showing customer location, you can establish your brand’s diversity.
How to Display Recent Sales Notifications for WooCommerce Store?
Now that we understand the importance of Social Proof and Honest Marketing let’s take a look at how to set this up for your WooCommerce store. Displaying WooCommerce recent sales popups or notifications is just a matter of a few clicks. WPfomify is a popular honest marketing plugin for WordPress; it integrates seamlessly with WooCommerce.
Let’s take a look at how you can display WooCommerce Recent Sales Pop Notifications easily with WPfomify.
Before you begin, make sure you have installed & activated both WooCommerce & WPfomify plugin.
1. Setting Up WPfomify
To Setting Up your first notification, go to the WP admin area > WPfomify > Add New.
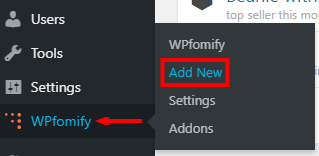
2. Create Recent Sales Notification
As soon as you select Add New option, you will see a page with the title “Add New.” Give a proper name to your notification & proceed.
Here we have four tabs: Source, Content, Display & Customize. With these tabs, you can easily customize notifications as per your preference.
We will look at each tab one by one.
Let’s Begin:
3. Customizations in Source Tab
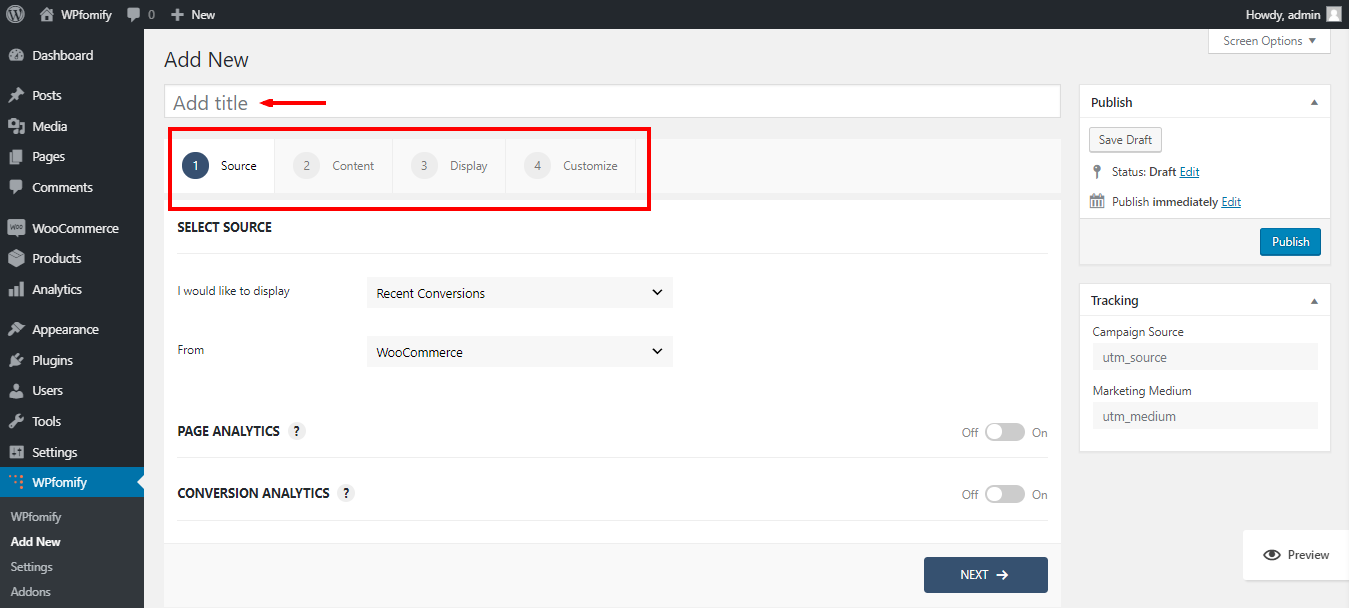
Select the Type & Source of Notification
This tab has primarily two options; from the first option, you can select the type of notification you want to display on your website. With WPfomify plugin you can display Notification Bar, Recent Conversions, Reviews & Floating Button on webpages
We select recent conversions options as we want to show current sales notifications for WooCommerce Store. As soon as you choose it, you will see one more section. Here you have to select the source from where you want to pull the information regarding conversions.
Though we want to display notifications for the WooCommerce store, we can simply select the WooCommerce option from the drop-down list.

Display Page Analytics
We all know the importance of social proof in marketing and displaying recent sales on websites is an excellent way to build proof.
Showcasing live data such as “159 people currently viewing this page” or “120 conversions in last 12 hours”, helps you to boost sales.
With the Page Analytics option of the WPfomify plugin, you can easily show recent sales activity to your visitors.
For displaying page analytics, enable the toggle button, Set Min & Max Value. The plugin works on a simple algorithm in which it automatically takes a random number between the Min & Max value, and displays the same on your web page.
Also, here you can define custom Title & Message you want to display to your visitors.
After completing all the options, you can check the preview of notification by clicking on the “Preview” option in the bottom right corner.

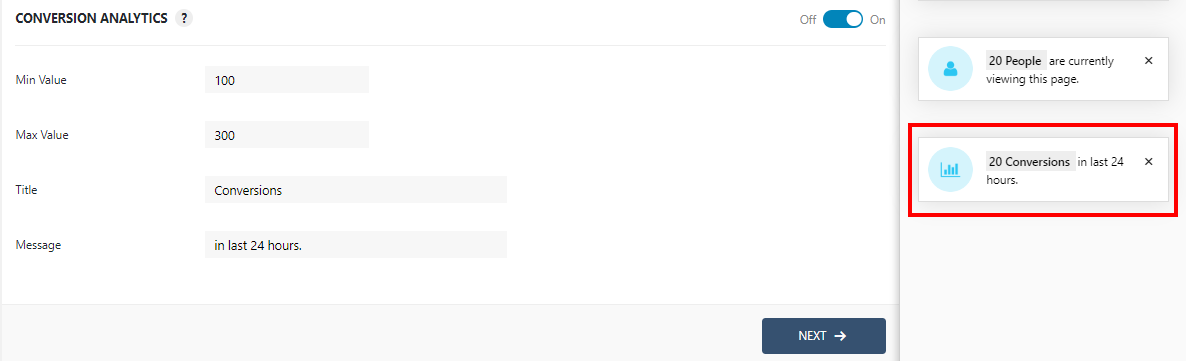
Display Conversions Analytics
With this option, you can display conversions notification like “110 conversions in 12 hours” on your web pages.
For displaying this feature, enable the toggle button: set min & max Value. Customize Title & Message as per your preference.
4. Customizations in Content Tab
After completing all conversions options, you have to move next to the content tab.
Highlight Notification Row
This is the first option of the content tab. With this option, you can choose which row you want to highlight in the notification bar. Select the row from the drop-down list and to see the changes live click “Preview” on the lower right corner.
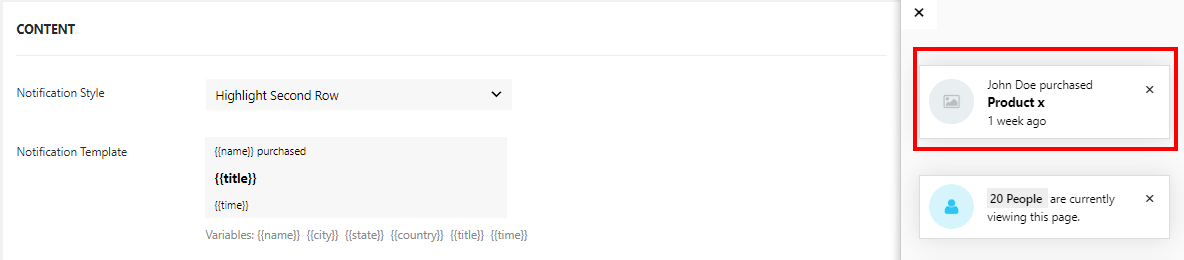
Add Custom Text and Variables
This is the custom text template. You can change it according to your requirements using text and variables. The rest of the options in this tab varies according to the source.
For example, if you want to display the name, city & time in the notification bar. You have to define variables in the notification template like shown in the below picture.
Here you can choose variables like Name, City, Time, State & Country.
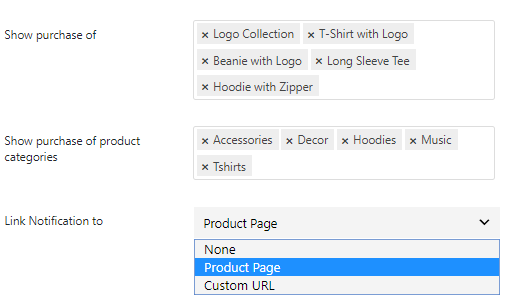
Display the purchase of a particular product or category
From this option of WPfomify plugin, you can choose if you want to display the purchase of a specific product or all products.
If you define your products in some particular category & only want to display the purchase of those specific categories, you can easily do it by this option.
Add Link to the Notification bar
You can also add a link to the notification bar. Either link the notifications to the product page or simply can give a custom URL.
5. Customizations in Display Tab
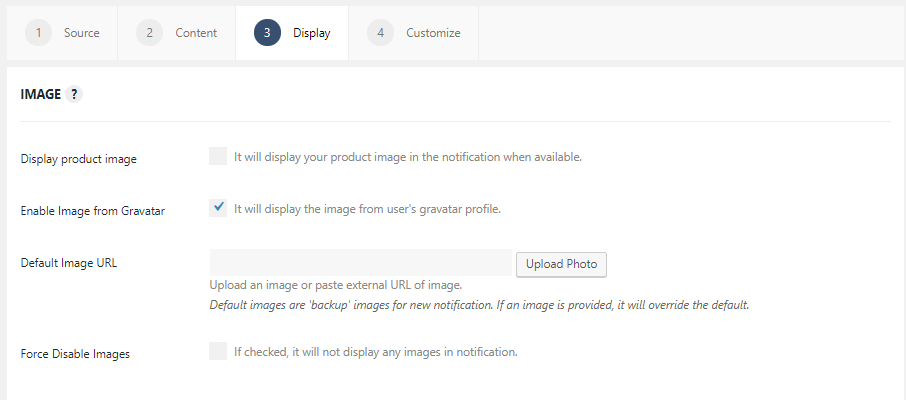
Display Buyer or Product Picture in the Notification Box
From this impressive feature, you can change the settings for the images on the notifications. You can even display a product image or can enable the user’s image from the gravatar profile.
Also, you can define a default image URL for the products.
Furthermore, if you want your notification to be plain without image, click on the Force Disable Images option.
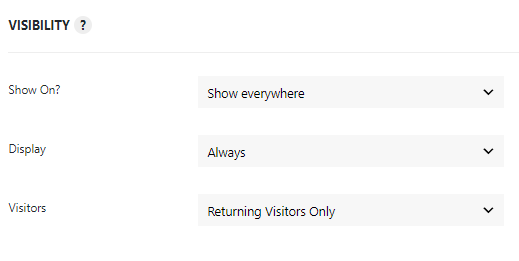
Set Visibility Conditions to the Notifications
Here you give limits to your notification, where, how & to whom it should appear.
WPfomify also gives you the flexibility to show notification everywhere, on some selected pages or you can easily hide them on some particular pages.
Apart from this, from this section, you can also set parameters such as limit the views to logged in/logged out users.
Also, you can set limitations to the notifications for the visitors.
6. Customize and Publish
Once you are done, click on the Customize tab. Here you define how your notifications look on the web pages.
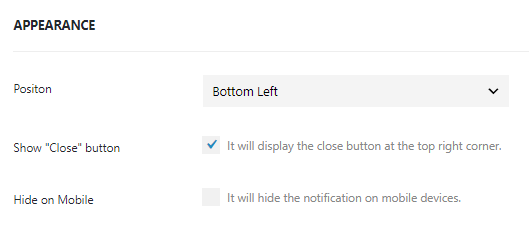
Set Position of the Notification Bar
This option lets you set the position of the notification bar. Either you can show it on Bottom left or Bottom right of the web pages.
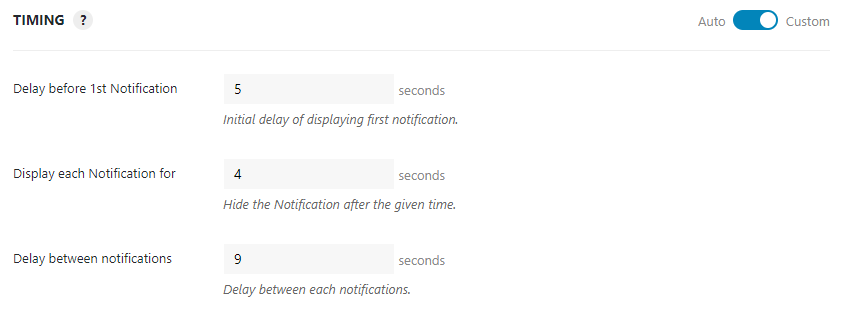
Set Display Timing of Notification
Although WPfomify plugin has its own optimized timing for highest conversions with the Auto setting.
However, in case if you want to set your custom values. You can do it by this option.
With this, you can set the display timing of each notification. Also, you can set delay timing between each notification.
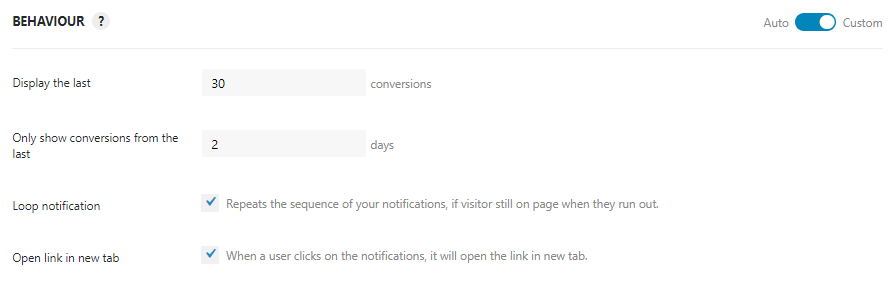
Define when should the notification appear
This option lets you control the display behavior of the notifications. For example, if you only want to display the last 30 conversions, you just have to set a value here.
Design & Customize Notification Bar as per your Website Looks
Here you can design & style notification bar according to your website looks. You can change the text, background, & link color using the options in this tab.
Also, you can customize both box & image of the notification bar.
Apart from this, you can adjust the Shadow properties & customize the Typography of the box in this tab.
7. Track notifications performance using Google analytics
This is one of the most useful & important features of the WPfomify plugin.
With this section, you can also add campaign parameters to the URLs and keep a check on the performance of the notifications using Google analytics.
![]()
Final Result:
That’s all! Yes, setting up a WooCommerce Recent Sales Notification popup is easy. WPfomify gives you complete flexibility and options to customize the notification. You can display sales for selected products, all products or from particular product categories.
Increase your WooCommerce Sales, Get WPfomify now!
Increase sales, make more money, get more customers, all that with a few clicks! Get WPfomify for your WooCommerce website.