Understanding the Content Tab
The Content Tab defines the content that is needed to be displayed.
Since the options in the Content Tab vary by which “type” or “I want to display” option in the source tab, we will look at all the options individually.
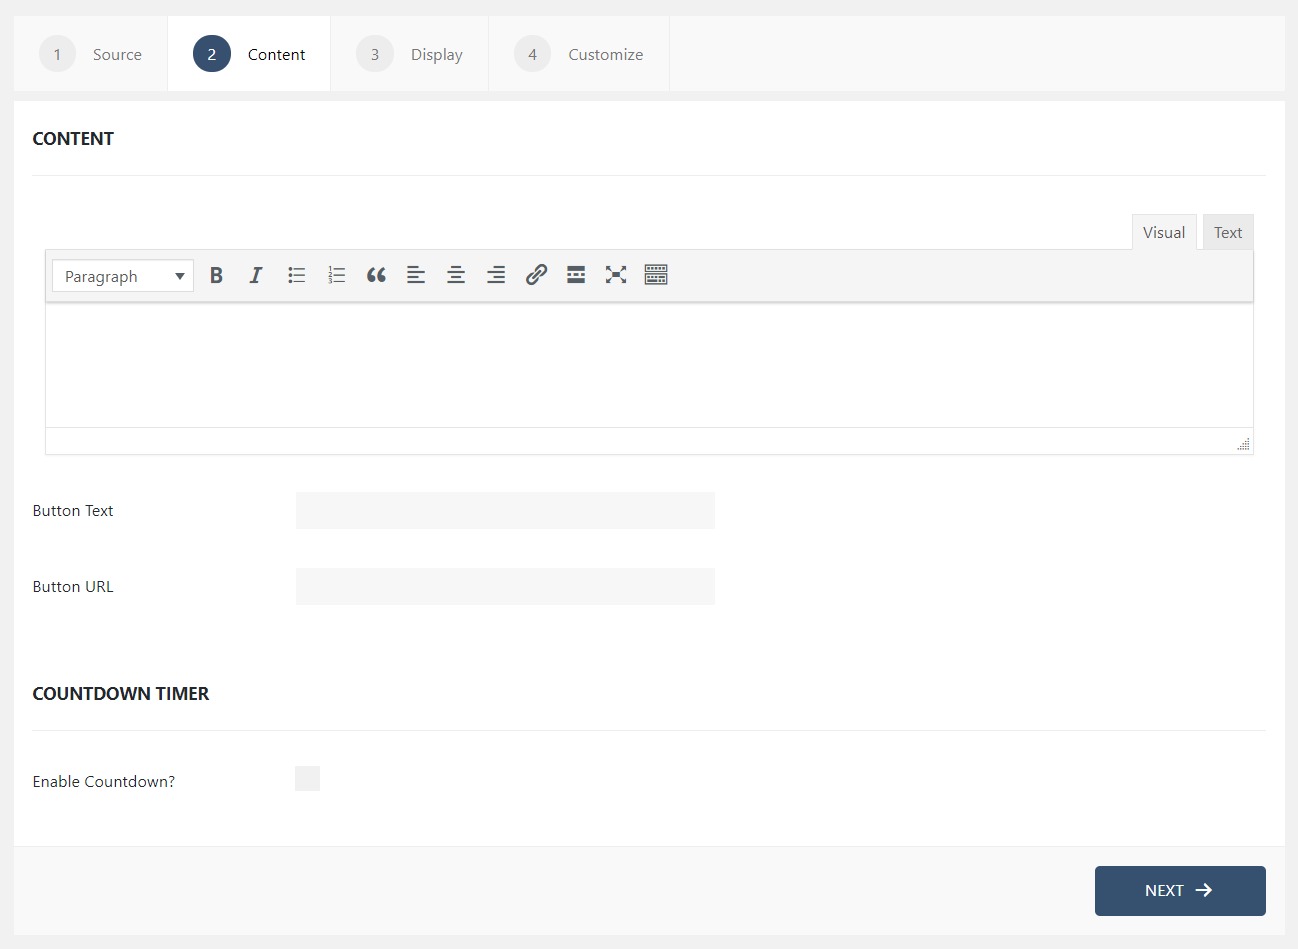
Notification Bar
Upon choosing Fomo Bar, you will see these options in the Content tab.
- Text Editor: Here you can enter the text that you want to display on the Notification bar.
- Button text: Simply type in the text that you want to be displayed on the button on your notification bar.
- Button URL: This will allow you to enter the link that you want your user to be redirected to when they click on the button.
- Enable countdown: This will enable the countdown timer.
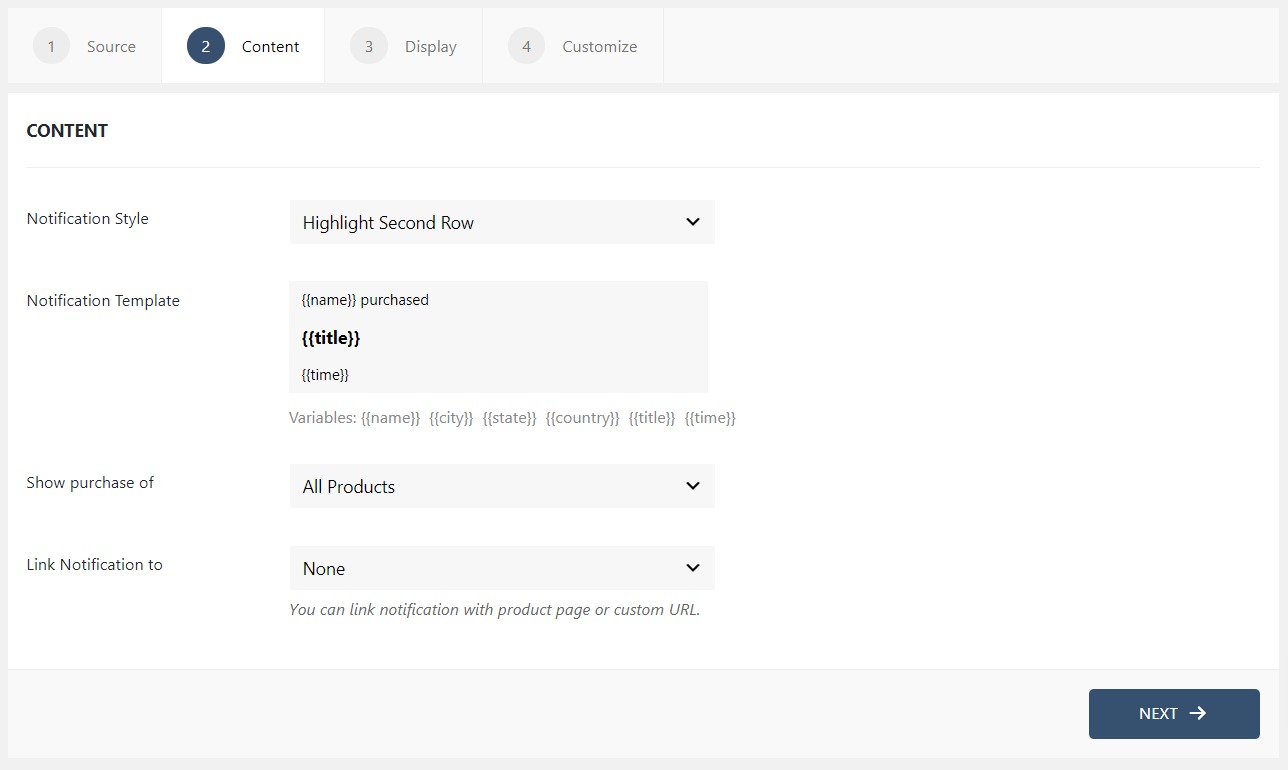
Recent Conversions
Upon choosing Conversions, you will see these options in the Content tab.
Note: Some of the options will vary based on the source.
- Notification Style: This option lets you choose which row you want to highlight on the page. You can simply select the row from the list and can see the changes live on the lower right corner.
- Notification Template: This is the Text template that defines what message your notification bar will display to the user. There are different variables that you can use to fetch that particular data from the source.
- Show purchase of (WooCommerce & EDD): From this, you can choose if you want to show the pictures of a particular product or all the goods.
- ActiveCampaign/MailChimp/ConvertKit List: When you have the list connected to WPfomify you can fetch the file directly from the server.
- Link to: If you enter a link into this text field, the notification will redirect the user to this URL upon clicking.
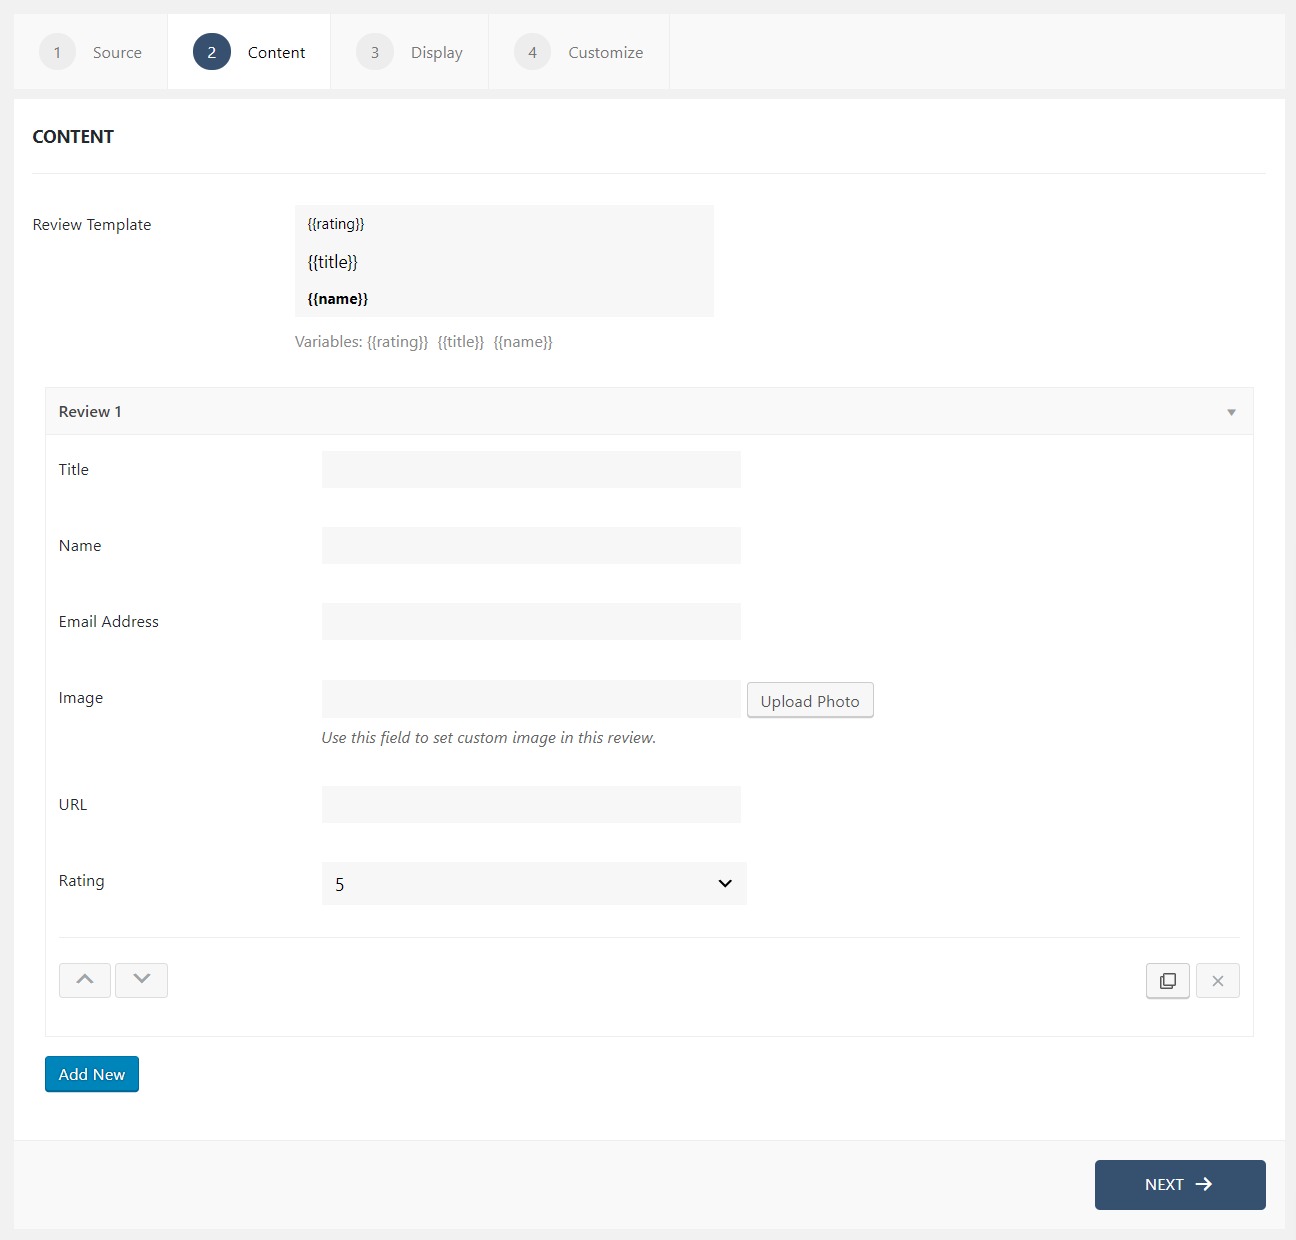
Reviews
Upon choosing Reviews, you will be able to display your customer reviews to your active viewers. You will see these options in the Content tab.
- Review Template: This is the Text template that defines what message your notification bar will display to the user. There are different variables that you can use to fetch that particular data from the source.
- Review: Here in the fields, you can enter the data and the Notification template will pull the information from this source.
- Add New: This button allows you to add new reviews to the notifications. You can copy the review as well by clicking on the copy icon on the respective template.
Floating Button
Upon choosing the Floating button, you will see these options in the Content tab.
- Icon: This option allows you to select the custom icon on your floating button.
- Header: This will be the Header for your Box that will be displayed when the user clicks on the button.
- Content: This defines the Content that appears under the header.
